Showing posts with label Annie Sloan Chalk Paint. Show all posts

Friday, April 11, 2014

The Unintentional Project- Craigslist Dining Chairs

Do you ever find yourself in a situation where you are doing something that you shouldn't be?  And you know it?  But you don't care?  That's me.

Since we are expecting twins, I should be checking things off my list such as organizing the house, purging old baby things to make room for new, working on a nursery.  You know, normal stuff that pregnant people do.

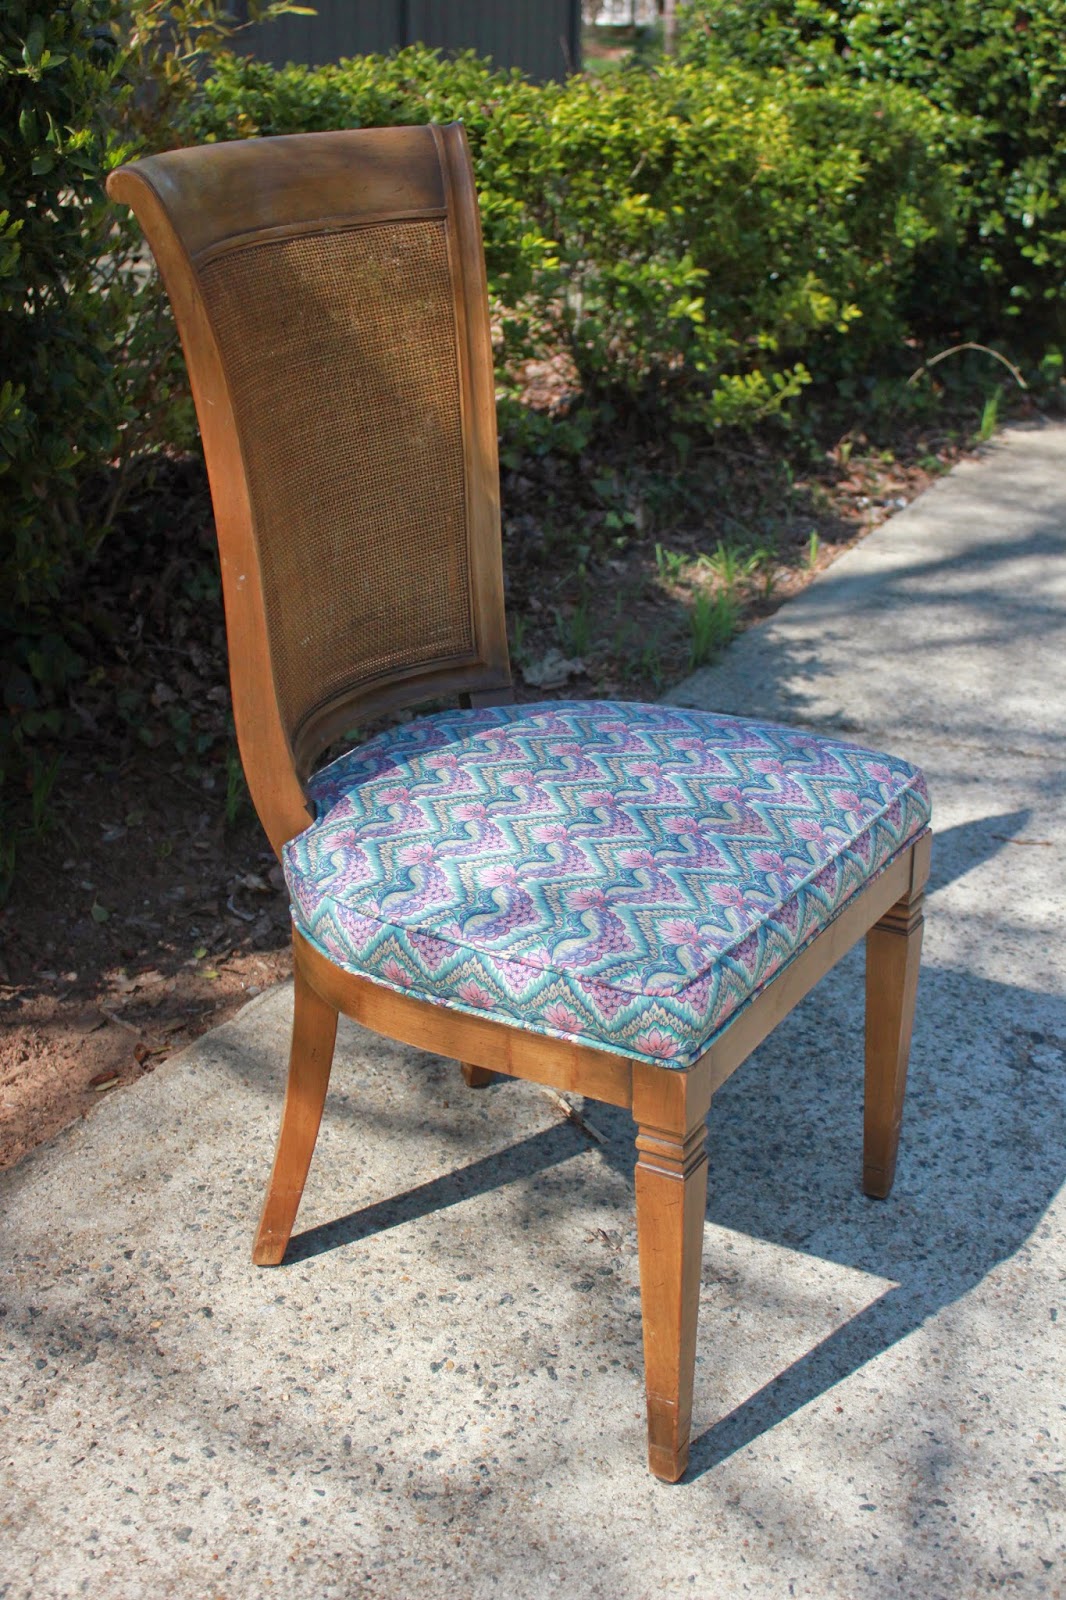
Well, this is totally off base.  I found this great dining chair set on craigslist a few weeks ago and had to get it.  I drove over an hour to go pick up the chairs (but could only fit 6 in my car) and then had Trey drive back over the weekend and pick up the remaining chairs and table.  The problem?  

I already own dining chairs and a dining table

In my defense, I've never been too keen on my current chairs.  They, too, were a CL find.  I bought them for a great price and even had them reupholstered until I could afford something more my style one day.  I had been eyeing these chairs, but probably wouldn't bother buying them for another million years.


So, when I found these Widdicomb chairs for a steal I HAD TO HAVE THEM!  They may not look like much now, but I have big plans for these lovely ladies.


When I first saw the post on CL- I immediately remembered this image that reminded me of the chair style:
Via Alice Lane Home, Photo by Ashlee Raubach
Of course the chairs above are more elegant, fully upholstered, and painted (what looks like) metallic frames with nailhead trim.  I wouldn't go this route, but I like the idea that if one day I want to upholster the back I can change things up.
As for now, I love the cane backing and want to keep it, but am definitely thinking of painting the frames lighter and leaving the cane natural....possibly like in these examples (These are pretty traditional, so wouldn't go that far, but love the natural cane):

Via Hello Lovely Decor
Via Mustard Seed Interiors
I originally thought I would just sell the table and keep the chairs.  But I really love the table too, it has such delicate lines I don't know if I want to sell it yet.  For now, it's living in my garage until I can figure that out....hence the beautiful photos.


Who knows how long this project will actually take (since Trey will be the one painting and waxing, haha).  And it's really not a priority.....But I'll keep you posted when (and if) we ever finish!

PS- I have 8 upholstered chairs for sale now if anyone would like to take them off my hands ;)

Update: Chairs have been sold!  Did I mention I love CL?  Now I need to get started on the nursery...

Monday, February 24, 2014

Garage Sale Retro Dresser Makeover

Wow.  It's been Halloween since my last post.  Yeaaah...sorry about that.  But I have an excuse....


Actually, two excuses....


Actually, three excuses if you count my toddler too (this list could go on and on so I'll just stop there) :)
So the big news is we are expecting identical twin boys!  We have a long road ahead, but I am finally starting to feel like myself again and therefore can finally share this dresser project I did a couple months ago.  (Note: Once I found out we were expecting, Trey actually did most of the work...painting, polishing, sanding, etc.)  I just directed :)

I had been looking for a tall dresser for our bedroom for a long time when I stumbled upon this piece at a garage sale...(excuse the iphone photo!)


It's a little retro, which I thought could be a fun touch in our muted bedroom.  I loved the warmth of the wood, but it wasn't in the best shape.


I initially thought I would just sand off the top finish layer and re-stain but this gave me a lot more trouble than I had hoped.  We started sanding and discovered that veneers don't really sand down...hmmmm.  Then we started sanding EVERYTHING which was a huge mistake.

At first, it was looking slightly better, but the hardwood turned out to be yellow pine and it was SOOO yellow.  Here is a shot of the doors-  on the right the door is sanded and on the left is when I started adding the stain.  As you can see, the wood veneer is still showing the hardware mark and the frame was waaaay too yellowish for my taste.


YUCK.
I felt like I wanted to scrap the project at that point.  BUT THEN, I found this image on Pinterest....and it gave me some new inspiration on what to do.  


Via Cup Half Full
I loved the idea of insetting leather into the doors/drawers and painting the frame a slightly darker tone.  Because the hardware was real brass, I thought these light colors would really help the hardware stand out.  

So, I went a new direction and had Trey paint the frame Annie Sloan "Old Ochre" and bought some cream textured vinyl for the doors. I was looking for faux ostrich leather like in the photo, but again, was SO over this project at this point I just went with what they had at the fabric store.  Because I knew I would never be able to get the edges of the vinyl cut perfectly (and didn't want the edges to turn up over time), I found the smallest trim moulding I could find at Home Depot and had Trey cut the pieces for me using his miter saw to frame the door and drawers.  This trim pieces covered the edges making the drawer and doors look clean and tailored.  The moulding was attached at the edges using a brad nailer, and filled the holes with wood putty and then touched up with paint.


For the  hardware, I had my Dad cut off the backplates (which I thought looked dated) and Trey spent some time polishing with Brasso.


Instructions on the bottle say not to let it sit on the brass, but the tarnish was so intense we disregarded this and put all the pieces into a plastic bag with the Brasso and let is sit for a while before trying to polish...seemed to help.  I didn't want it to be shiny, there is still a bit of patina on it which I think looks great.


Sorry I don't have more progress shots, after the wood finish stripping fiasco, I was so tired of this I just wanted to get it out of my garage!  

But here is the piece all finished- I absolutely love how it turned out!   


And for fun here's a side by side before & after:


Ahhh...so much better.  I don't know how much time I'll be having over the next few months to do anymore big projects, but do know I have a new nursery (and big boy room) to plan!  Hopefully it won't be another 4 months before I post on that! :)