Showing posts with label Nursery. Show all posts

Wednesday, October 15, 2014

Nursery Reveal....4 months late and some news!

Hi, friends!  I really dropped the ball on the twins nursery post, considering it was finished back in May....
Well, here we are in mid-October and I have finally found a few minutes (gasp!) to copy and past these photos into a post.  (Mind you, as I type, Ward is putting stickers all over me and Thomas the Train is providing some nice background ambience...Thomas, you are failing me in the distraction department, FAILING ME!) 
Anyways, no time for flowery well-thought-out words.  Oh, wait. Babies crying. Hold on.

Now I'll attempt typing with a baby on my lap.  This is fun, right?

I knew when we found out we were having two more boys that I wanted the nursery to be bright, cheerful, and colorful.  I've seen many beautiful nurseries on pinterest with chic, expensive Oeuf cribs, and perfectly stenciled ceilings, and albeit stunning, I ain't got time (or money) for that.  I also wanted simple, easy, and affordable.  We cleared out our empty junk room guestroom and went to work.

Here's the before.  

My favorite thing was that awesome brass boob fixture. Trey really wanted it to stay. I'm serious.  He thought it was fine. But then I reminded him of the importance of a fan in a babies room and he was kind enough to oblige...   


And Here's the after:

I wanted to reuse as much from Ward's nursery as possible.  We did purchase two new Jenny Lind cribs as Ward's crib was discontinued and I couldn't find a second to match.  I never thought I would buy ebony cribs, but I love how they pick up on the color in the moroccan shag rug. (My biggest splurge, but I got the rug for 70% off!)


As I mentioned in previous posts, the ombre dresser was a craigslist find revamp and the paper plane mobiles and cloud art were both easy DIY projects.  I bought the giclee above the dresser from Etsy shop Kiki & Polly. I just love the image of the 3 boys (if only they had blond hair!).  The little mountain peaks were also an Etsy find, from Kinderboothen.


And the mobiles hang above map-printed sheets (such a good deal!)


Here's the before shot of the opposite wall:


And after:

You may have noticed that the Sharon Montrose twin bear photo is framed differently in these photos.  That's because it fell off the wall and broke between days of me taking photos!  


The sleeping fox pillow from Urban outfitters was in Ward's nursery previously and the G and B blocks were a sweet gift from friends that have their birth date information engraved.  The floor lamp behind Ward's old glider was a DIY lamp from an old column.

The bird painting was something I made previously for Ward's room, the two-seater bicycle is a small DIY sketch and the Amersand art is also a DIY printable.  The small squiggle drawing was one I received from work years ago.


This 1st Samuel print was also an Etsy find....I guess it's a theme here.  I actually MADE the polka dot & gray drapes in my giant pregnancy state.  The fabric I had picked up originally for Ward's nursery (a steal for $7/yd!), two years ago and never got around to using it until now.  


There you have it!  Here are a few more photos from our newborn session a couple months ago :)


Ahhh...finally it feels good to get this post done.  Especially because in the next couple days I have to PACK UP this room.  Why's that?  WE ARE MOVING!  AGAIN!  I've officially lost my mind.  More on that later...!


Thursday, July 10, 2014

DIY Paper Airplane Baby Mobile

Well, most of y'all may know that our twin boys arrived earlier than expected, on June 1st!  After spending 18 and 22 days in the NICU, we finally have both of them home and are adjusting to having 3 under 3 (or actually, 3 under 2-1/2!)  I had hoped to finish the nursery posts before the babies arrived, but they had their own agenda :)  Newborn photos to follow one of these days...

Anyways, getting back to the nursery posts. Finally, a project that does not involve painting!  Hallelujah! 


When I was on bed rest before Ward was born, I spent my spare time in the hospital making this nursery bird mobile.  It is still hanging in Ward's room, and even though he's not a baby anymore, I still can't bring myself to take it down yet. 

Anyways, I couldn't really re-use it in the twins nursery b/c I now need two mobiles!  And since I don't have all the time I used to, I wanted to make something super easy....and paper planes were the easiest thing I could think of.  Now, there are a lot of steps here, but each part of this mobile can easily be done in front of the tv, so it just took some patience (and a helpful husband to speed things up). 

Here are the materials I used:


22" embroidery hoop
Yarn and/or Twine
Wooden Letter (not necessary, but I wanted to personalize each one)
Scrapbook paper in various patterns/colors
Glue Stick
Scissors
Fishing Line
Small screw-in hooks
*Paint (if you're like me and change your mind after you're finished)

First, carefully break off the hardware on your embroidery hoop with some pliers or scissors.  If the wood chips it's not the end of the world....as you can see mine did a little.  


Then, adjust the broken piece to be the same size as the smaller one.  Duct tap the two pieces on top of each other so the hoop will be thicker when you wrap it.


I wrapped my hoop with this burlapy twine I found at Michael's.  It doesn't take that long and is easy to do in front of the tv at night.  Once the entire hoop was wrapped, I just used a drop of fabri-tac to secure the end piece to the hoop.


Then I took my colorful yarn and wrapped 5 evenly spaced hanging points on the hoop.  An easy way to find the correct hanging points is to lay your hoop on a sheet of paper and draw a pentagon in the center.  I just eyeballed it and when I checked the measurements it was pretty spot on.


After the hoops were wrapped, I took white yarn and tied a knot around each colored hang point, and then knotted them together at the top.  Just make sure you measure out the same amount of yarn for each hang point and you should end up with an even-hanging hoop.

Because I wanted to do something a little different, I took wood letters and wrapped them in my colored yarn and then attached the white yarn to a screw in hook at the bottom of the letter.  (You will also need a screw for the top of the letter too).

Once the hoops were finished, I started on the planes. Take two pieces of the scrapbook paper and glue them together using a glue stick.  


We debated making different airplane styles, but since the paper was pretty thick with the two pieces back to back, it was easier to fold just a classic style plane.  If you need to know how to fold a classic paper plane you can find out here :).  To get the size plane we wanted, we had to scale down our sheets by 1/2, so 4.25"x 5.5"

After Trey folded the planes, the tricky part was hanging them so they didn't droop or nose dive.  We ended up using a small pin to poke 3 holes through the plane, and then threaded fishing line through each hole and knotting at the top. (Making sure that they hung level.)  Then, I carefully cut the unnecessary 2 strings, which left me with one string that I tied to the embroidery hoop.


After the mobiles were finished, I had a change of heart and decided I didn't want the letters to be wrapped in yarn anymore (classic me), so I unscrewed the pieces, cut off the yarn and Trey painted them the darkest blue from the ombre dresser for a cleaner look....(I guess I lied, there was painting involved.)  Then, I simply attached the pieces back together and here it looks like all together:


To enhance the background and add some color on the wall behind the mobiles, I used 22" embroidery hoops inset with light blue canvas fabric.  Then, I took some plain white felt and cut out cloud shapes and glued them with fabric-tac. 


To hang them from the ceiling, we installed a drywall hook and I found some old drapery tie backs that I had in my fabric stash, which ended up working perfectly.


And here is the view that the little guys will see


For the record, I DID miraculously have the nursery completed before the babies arrived, but unfortunately had a picture fall off a wall and break, so once I get to replacing it I'll post pictures of the completed room!


Wednesday, August 28, 2013

Adorable Kid/Baby Sheets


I stumbled upon these crib/toddler sheets and thought they were all adorable! There is definitely a growing nautical trend these days.
Really loving the Serena & Lily Cut Circle, Restoration Hardware Vintage Planes and Layla Grace Out to Sea prints ...


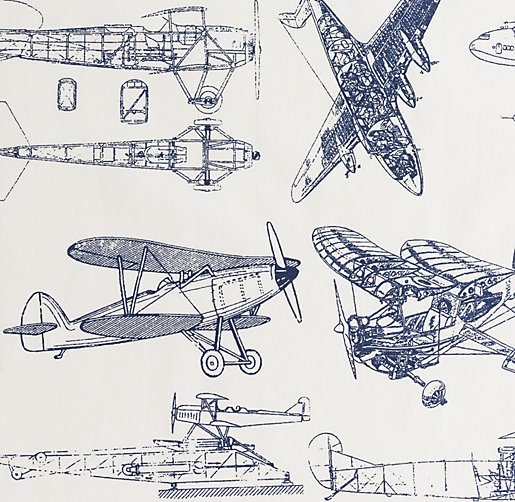
Restoration Hardware Vintage Plane Blueprint


Restoration Hardware European Whales


Serena & Lily Aqua Trellis

Serena & Lily Cut Circle
Serena & Lily Blue Crab
Layla Grace Out to Sea Blue

Unison Home Regatta Marine
Unison Home Anchors

Land of Nod Yellow Stripe
Land of Nod Whales


Monday, August 19, 2013

DIY Nursery Bird Mobile

Note:  I had written the majority of this post a VERY long time ago, but never got to hang the mobile until we moved in with our inlaws.  So here is the published version, late but better than never!

Now that Ward is approaching 18 months old, I'm finding myself already thinking about redecorating his nursery into a big-boy room.  

But before I get into that, I never got to posting about one of my diy nursery projects....

I was originally going to buy a nursery mobile off Etsy, but figured I could save some $ if I made it myself.  I knew I wanted to have the mobile be bird-themed.  I just googled "nursery bird mobile" and found a great mobile example and template for sewing fabric birds here.  

I got some fabric scraps and started sewing.  First I tried to use my sewing machine...big mistake.  There were too many corners and I ended up sewing the birds face off...so just did it by hand and stuffed them with some leftover batting I had lying around.  I am no seamstress, these are definitely rough...but once they were stuffed they started to look okay!  


Then I went outside and found some twigs.  Trey cut off the rough edges and sized them down with his miter saw.

I broke out the modge podge to seal the wood so it wouldn't chip over Ward in his crib. 


It goes on white, but dries clear.  One mistake I made was letting it dry on the paper towels.  The paper towel definitely stuck to parts of the twigs and I had to spend some time meticulously picking it off.   


Then I figured out where I wanted the birds to go, and tied them to the branches.  The tricky part is then using fishing line to suspend the twigs from one another, the weight had to be balanced.  Just used trial and error until it was all in balance.


These photos were taken back when we were staying with our inlaws, not much has changed in his room now, except he is 3x bigger!